
Is your Dell laptop battery light flashing orange when plugged in?
As with most indicator lights, this is meant to tell you that something is going on with your battery. Although it seems like a complex problem, it’s not. In the next section, I’ll discuss why this happens – and what you could do to stop it.
Let’s go!
Table of Contents
What Does the Blinking Orange Light Mean With a Plugged Dell Laptop?
According to the Dell User Community, this happens when the battery has reached the end of its serviceable life.
See, if the CMOS battery is not damaged, the indicator light would be green – meaning it’s charging. But if it’s showing an orange flashing light, then it means that the battery is not charging anymore.
This often happens when the battery is more than a year old or has completed several charge cycles. Serious damage can also happen when the laptop is left charging for a long period of time – or if the connector has become faulty.
In a nutshell, the flashing orange light means it’s time for you to change the laptop battery.
How to Check Dell Laptop Battery Health

Apart from the flashing lights, you can check for dead battery symptoms through a variety of ways:
BIOS
The BIOS is the hardware found on the motherboard. Here, you can check the battery health by doing any of these two methods:
Method 1:
- Press F2 once you reach the Dell logo screen.
- Go to General and Click on Battery Information.
- Check the Battery Health illustration. If this data is unavailable or blank, then the battery is suffering from a fatal error.
Method 2:
- Press F2 upon arriving at the Dell logo screen.
- Click on the tab named ‘Advance’ to check Battery Health information.
Diagnostics
- Press F12 once you reach the Dell logo screen.
- Choose ‘Diagnostics’ from the boot menu and press enter.
- Respond to the Preboot diagnostics appropriately.
- Read the battery test results. If it shows ePSA 2000-0132, then this means that “The battery is reaching the end of its usable life.”
Dell Power Manager/Command
- Access the Dell Power Manager/Command center (varies according to model.)
- Look for the Heart icon. This indicates Battery Health. Depending on the current situation, you may see:
- Four green dots –Excellent (maximum battery capacity)
- Three green dots – Good (reduced operating time due to the decrease in long-term battery life)
- Two yellow dots –Fair (battery near the end of usable life, will need to be replaced soon)
- One red dot – Poor (battery is unable to provide power – must be replaced ASAP)
- Empty dots – Battery is inoperable / status cannot be determined
Multimeter
A multimeter, which is designed to measure current, resistance, and voltage, can help you confirm if the battery is indeed dead.
According to this video, the first thing you need to do is detach your battery from the laptop. When doing this, make sure that your device is turned off and disconnected from a power source.
Next, remove the screws that secure the battery (you will find this at the back of your Dell laptop.) Lift the battery away from the laptop. Avoid bending it or applying excess pressure when you do so.
Once you’ve detached your battery, look for its positive and negative terminals. In most cases, these are labeled with the (+) and (-) sign.
Attach the red cable to the (+) terminal, and the black cable to the (-) terminal. The battery is considered dead if the reading is near 0.
Troubleshooting Dell Laptop Battery Issues
Although a battery light problem indicates that you need to get a replacement right away, there are a lot of things you can do while waiting (or saving up.) Here are seven of them:
Check the AC Adapter
The orange light may be blinking because your laptop did not recognize your AC adapter. To fix this, you need to:
- Restart your laptop.
- Press the F2 key several times once the Dell logo has appeared. You should see an ‘Entering Setup’ message after doing so.
- Go to the BIOS options to verify the adapter type. For example, if the display says ‘None,’ the power adapter may not be connected to the laptop or wall outlet.
Pro tip: If you have exhausted all methods and the adapter is still unrecognized, then it’s probably time for you to buy a new Dell charger.
Charge the Battery in BIOS Mode
- Turn off the laptop or press the laptop’s power button to do so manually.
- Restart the laptop. Press the F2 key several times to enter BIOS or System setup.
- Check if the battery life has increased. If the level hasn’t changed, then the battery is indeed damaged.
Charge the Battery With the Laptop Turned Off
- Turn your laptop off and plug it into the charging port for several hours.
- Check if the battery life has improved. If not, this means you need to replace your laptop battery right away.
Run Windows Battery Troubleshooter
Available for Windows 10, Windows 8 or 8.1, and Windows 7, you can run this troubleshooter by doing the following:
- Click on the Windows and R keys.
- Type Control in the Run Dialog box. Press the Enter button.
- Type Troubleshooter in the Search box. Click on the ‘Troubleshooting’ option.
- Click Power (located under System and Security.)
Uninstall/Reinstall Battery Driver
- Press the R and Windows Keys.
- Type msc in the Run dialog box. Press Enter.
- Click the > and + icons next to Batteries (under Device Manager.)
- Click on Microsoft ACPI-Compliant Control Method Battery and choose Uninstall.
- Click OK to uninstall. Restart your laptop.
Update BIOS
The last update of BIOS is crucial if you want your laptop to recognize the AC adapter correctly. As I’ve mentioned above, this problem will end up zapping your computer’s power.
Update Dell Quickset
Dell Quickset, on the other hand, is a software suite that helps improve your laptop’s functionality. The coolest part about this feature is that it allows you to:
- Enable or disable battery charging
- Modify Fn key behaviors
- Change the wireless shortcut key
How to Replace a Dell Laptop Battery
Now that you’re certain that the dead battery is the root of the problem, it’s time for you to replace it.
According to the Dell Company, you need the right tool to perform a battery replacement. Depending on your laptop’s model, you may need a:
- Philips Screwdriver (or SIM card remover pin, if applicable)
- Plastic Scribe
Now that you have everything ready, you can proceed with the steps below:
- Back up all the data you have on your laptop. While the chances of losing them may be slim, you don’t want to leave everything to chance!
- Turn off the laptop. Make sure all the connections and attachments are detached from it.
- If you have an SD card or SIM card in your system, remove each from its particular slot.
- Flip your laptop over. Use the screwdriver to remove the screws securing the base.
- Use the plastic scribe to pry the laptop base open.
- Disconnect the battery cable.
- Turn the device over. Press the computer power button to drain any remaining battery power.
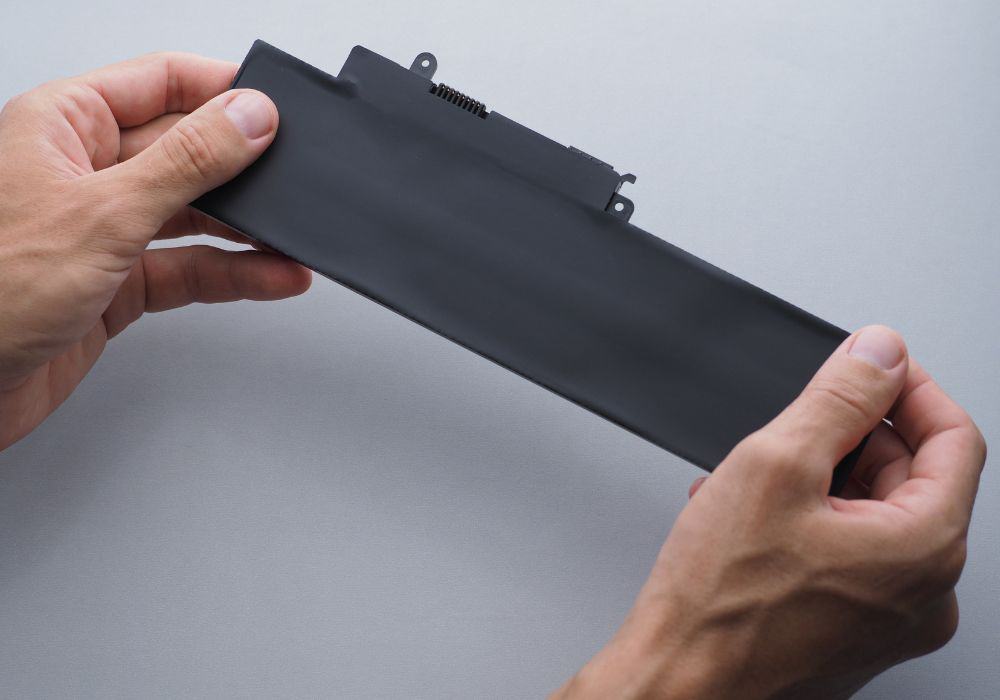
- Flip the laptop over again and remove the screws affixing the battery to the system.
- Lift the battery away from the laptop CPU.
- Install the new battery and secure it with the appropriate screws. Reconnect the battery cable.
- Re-attach and screw the laptop base cover. Re-insert the SD card or SIM card into the correct slot.
- Plug your laptop charger into the power outlet. There should be white lights (or green) flashing instead of orange or amber.
How to Make Your Dell Laptop Battery Last Longer

Even if you have replaced your battery, you may encounter charging failure soon if you don’t take good care of it. So if you don’t want to see the orange light blinking once again, then you should follow these helpful tips:
- Unplug your laptop when not in use. As you see, the most common cause of this power failure is overcharging. It’s a waste of electricity too! So remember to charge your laptop when it only needs charging. More importantly, make sure to remove the charger once the battery has hit 100%.
- Conserve battery power by modifying the display brightness/resolution, keyboard backlight, Windows power plan, and processor speed.
- Use the right types of chargers. Needless to say, the frequent use of a damaged charger may end up affecting the battery as well.
- If you plan on storing your laptop, charge your battery until it hits 50%. Don’t forget to place it in a warm, dry place.
Conclusion
When a flashing orange light appears when your Dell laptop is charging, it means that the battery is damaged. This happens when the battery is:
- More than a year old
- Subjected to several charging cycles
- Left charging for a long period of time
- Fitted with faulty connectors
As an expert computer engineer would advise, you can run diagnostics by following any of the methods above. But if you need help with any of the tips I’ve shared, post your questions below and I’ll try my best to answer them.