Are you finding yourself in a situation where your car battery has low power? For example, are you having starter issues, or are you finding your battery drained all too often? You may be in need of a battery isolator.
Installing a battery isolator is a great way to protect your main battery and auxiliary batteries from draining each other. Plus, it can also help protect your car in many other ways too.
But how do you install a battery isolator into your system? In this blog post, we will show you how to wire a battery isolator in your vehicle, and we will also provide some tips on choosing the right one. So whether you’re upgrading your old system or installing one for the first time, read on for all you need to know about how to wire a battery isolator!
Table of Contents
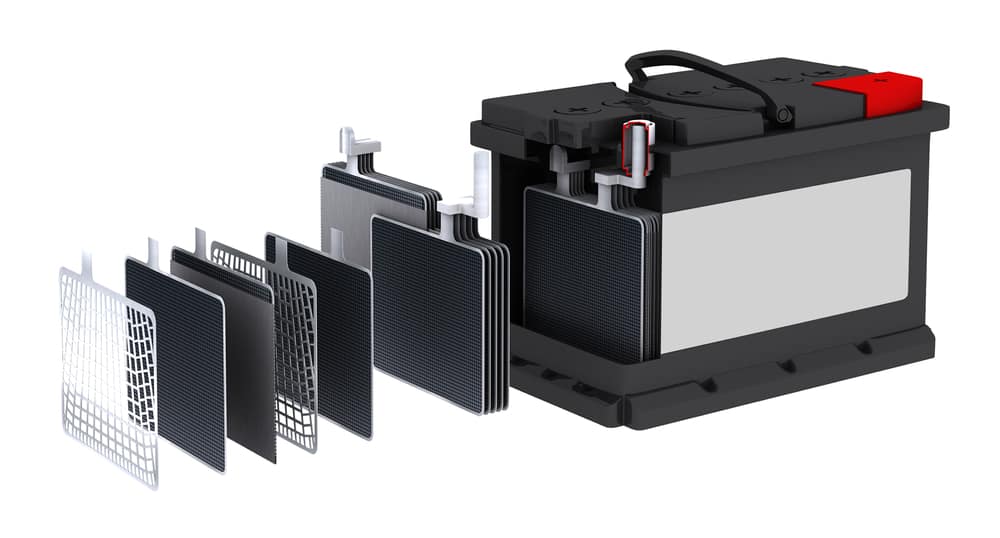
What is a Battery Isolator?
First, let’s talk about what a battery isolator is. A battery isolator is a device that prevents electrical current from flowing between two batteries.
Said in another way, it is a device that lets you charge multiple batteries from one alternator. It does this by using a series of diodes that only allow current to flow in one direction.
Not only does a single direction of current prevent the batteries from draining each other, it also protects the batteries from being damaged by voltage spikes, which we will discuss in more detail later. You can even get smart isolators that are microprocessor-controlled.
There are two kinds of battery isolators: solenoid and diode. The solenoid battery isolator is a bit more complicated. It utilizes many relays to manage the electrical current. Diode battery isolators, on the other hand, are less complicated and have a longer lifespan, using only two high-current diodes on the isolator to get the current to move to the battery.
The diode battery isolator is the most commonly used, so that is the one we will discuss in this article.
Why Use a Battery Isolator?

There are several reasons why you might want to install a battery isolator in your vehicle. We alluded to some of these reasons already, but let’s look at them in more detail here.
1. Prevent Draining Your Batteries
The most common reason to install a battery isolator is to prevent the secondary batteries from draining the starter battery. An isolator will allow the alternator to charge the starter battery while also protecting that battery’s current so that it doesn’t unnecessarily travel to any auxiliary loads that aren’t fully charged. The reason for this is that, if you allow both batteries to equal out their electrical current (giving you low power on each), you might not be able to start your vehicle’s engine.
It also allows you to have an auxiliary battery powering other moving parts in the vehicle, such as the stereo or the power inverters that charge your portable devices that you plug into your car.
Having an isolator can be useful, for example, in your vehicle if you have to stop and start it multiple times a day, so you don’t drain your starter battery. Another example would be if you have a deep cycle battery that you use for camping or running appliances, and you don’t want it to drain your main battery.
2. Avoid Voltage Spikes
Another reason to use a battery isolator is to protect your batteries from voltage spikes. If you have an auxiliary battery that powers electronic devices, it can be damaged by voltage spikes from the alternator. A battery isolator will protect your auxiliary battery from these spikes, and it will also prolong the life of the battery.
3. Creates Safety When Using Different Battery Chemistries
A really good reason to use an isolator in your alternator systems is when you are using two different types of batteries. For example, you might be using a starting battery that is lead-acid, while your secondary battery might be a lithium-ion battery. These batteries have very different chemistries and should never be linked together directly in a circuit.
Even though both of these types of batteries are 12V batteries, the lithium-ion battery actually has a nominal voltage of 12.8V or in some cases over 13V, while the lead-acid battery’s nominal voltage is 12.6V or 12.7V.
If you were to try to connect these two batteries directly, they would cause a surge in power and create too much heat. You’ll end up with more problems if you do this. This is why it’s always smart to add an isolator between the two batteries and the alternator so that varying battery voltage does not conflict.
How to Choose a Battery Isolator
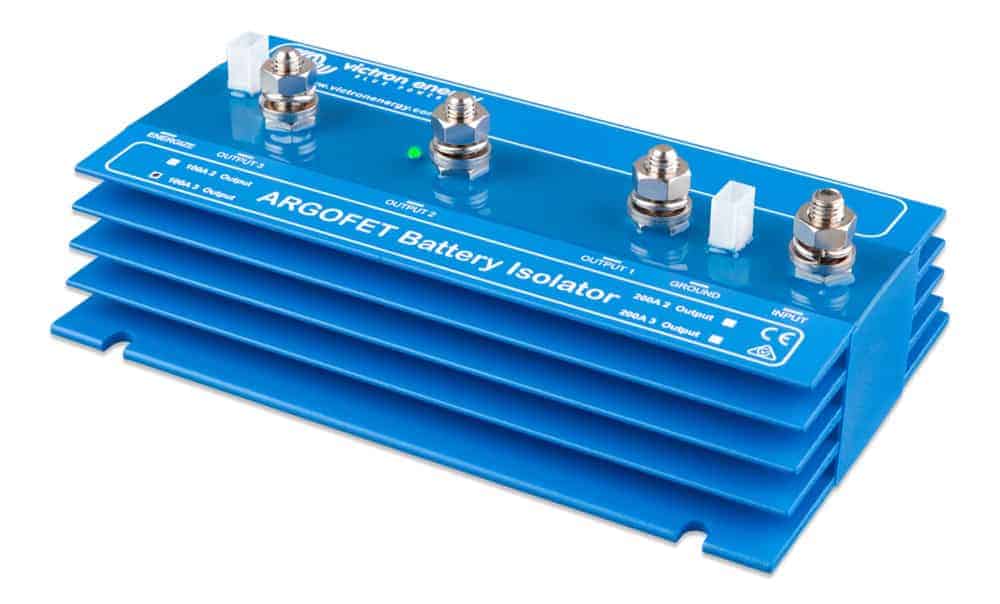
When choosing a battery isolator, the answer is actually quite simple: choose one that can keep up with your alternator.
Alternators have a maximum amperage. And while this maximum amperage won’t likely be reached, it’s safest to choose an isolator that is equal to or greater than this measurement. You don’t want to overload your alternator because you chose the incorrect isolator.
How to Wire a Battery Isolator
Now that you’ve chosen the correct isolator, it’s time to wire it into your vehicle!
Installing a battery isolator can seem like a daunting task, but with the right instructions it can be a breeze.
But before we begin – a word of caution to keep you safe. First, always disconnect the negative terminal of the battery first (the black wire), and then the positive terminal (the red wire), before starting any work on the electrical system. Second, make sure all connections are clean and tight before starting things up again to avoid voltage drop, voltage spikes, electrocution, and so on. And third, use heat shrink tubing or electrical tape to cover all exposed wires and terminals.
To install an isolator, you will need:
- A battery isolator
- Ring terminals (standard and blue insulated)
- Cables (red and black)
- Crimping tool
- Heat shrink tubing or electrical tape
- Screwdriver
- Drill
- Voltmeter
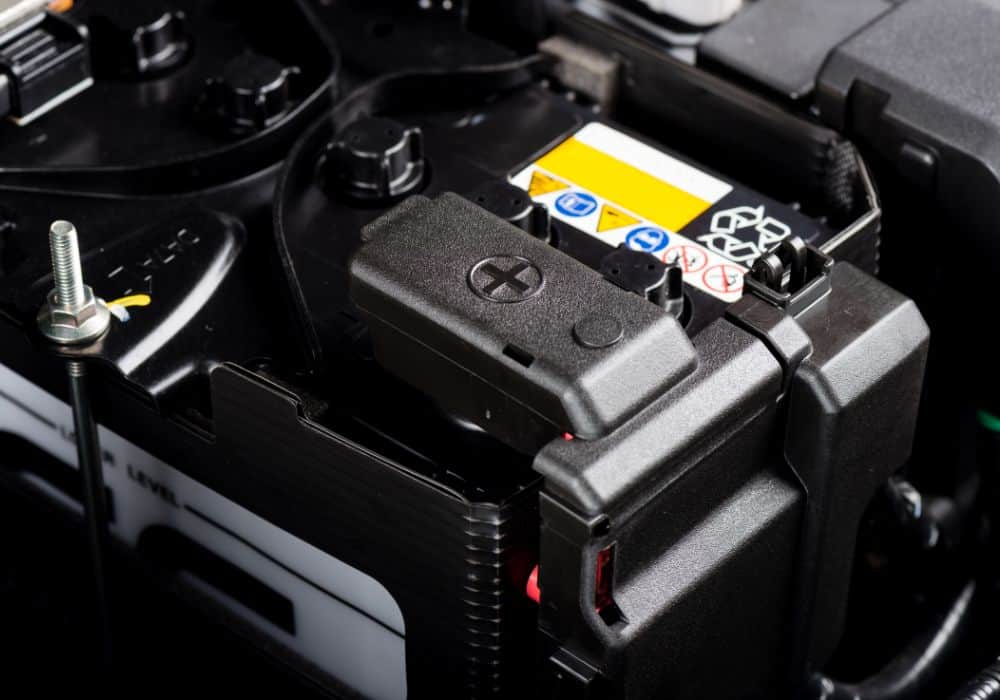
Step 1: Mount the Isolator
First, locate the starting battery in your engine bay. The battery will have two terminals – a positive (marked with a “+” sign) and a negative (marked with a “-” sign). As we mentioned, be sure to disconnect the negative and then positive wires before beginning work.
Next, determine where you want to mount the battery isolator. It’s best to mount it near the starting battery and away from any heat sources.
Once you have found a spot for the battery isolator, screw down the isolator’s mounting plate to the metal chassis.
Step 2: Attach the Wires to the Isolator
Strip the end of the red positive cable and cap the end with a ring terminal. Then similarly, put a blue insulated ring terminal on the end of the black ground wire on the isolator. Be sure to crimp it in place.
There are bolts on the underside of the isolator. Punch out holes of the wires beneath the battery isolator and attach the long red cable to the isolator’s red bolt and the shorter red cable to the other bolt. Screw the battery isolator to its mounting plate and then secure the ground wire to somewhere nearby on the chassis.
Step 3: Connect the Isolator to the System
Connect the short red wire to the positive terminal of the auxiliary battery next. Then take both the start battery’s positive cable (red) and the isolator’s long cable (also red) and attach both of them to the positive terminal of the starting battery using a screw. Make sure you are using the correct length of cable in this process.
Lastly, you’ll connect a short black cable from the negative terminal of the auxiliary battery to your vehicle’s negative ground (also black). You will then attach both of those to the start battery’s negative terminal. Make sure each connection is tight and secure.
Step 4: Test it Out
Once all of this is done, you will want to test that your completed circuit allows for proper charging of both batteries. Use a voltmeter to test that all of voltages match up.
Now, you may be asking if the isolator will forever keep your system working in this particular circuit. Actually, some isolators, such as the smart ones, come with an override switch.
There is an additional wire attached to it, a yellow wire with a slip-in terminal. When the end of the yellow wire is attached to the positive terminal of the starter battery, and the override switch is on, then voltage sense wire will be overridden. Doing so will allow both batteries to connect as they did before you added the isolator.
When would you need to do this? Only if your starting battery is low and you need to pull power from your secondary battery.
Conclusion to How to Wire a Battery Isolator
There you go! Now you should have a good understanding of how to wire a battery isolator in your motorized vehicle. Doing an install like this will ensure that your starting battery is always charged and ready to go, while also allowing you to use your auxiliary devices without any issues.
And as always, if you are unsure about anything in the process, you can always locate an illustration or diagrams online or contact a professional mechanic to do the modifications for you.
What battery problems are you facing under the hood of your vehicle right now? Let us know in the comments below!