
Are you a camper or RVer who is looking to ensure the safety of your electrical systems and appliances? If so, then you need to know about the RV battery disconnect switch. It is an essential device that will help protect both your rig and its occupants from any potential power-related issues.
In this blog post, we will explain why it is important to have an RV battery disconnect switch installed in your motorhome or travel trailer, how they work, what type of voltage they use, how to install them safely and properly, as well as a few other tips. With these insights into RV batteries and disconnect switches at your disposal, you can rest assured that everything will run smoothly during each camping trip!
Table of Contents
What is an RV Battery Disconnect Switch and Why Do You Need One on Your Battery Bank?
RV’s use deep cycle batteries to get around with – but there are times where you do not want the parasitic load of computer, radio, appliances, and more to drain the battery. That is where an RV battery disconnect switch comes in handy.
An RV battery disconnect switch is a device that helps protect the electrical systems and components in your recreational vehicle (RV) or motorhome from overcharging, short circuiting, and undergoing other potentially dangerous situations.
It also allows you to easily turn off all of the 12-volt electrical power supplied to your RV battery, which feeds energy to your appliances, such as your water heater or refrigerator. When appliances are not in use, you can simply use your disconnect switch to turn everyone off without needing to manually disconnect each one individually.
When installed correctly, this device will ensure that your rig’s batteries are protected from unintentional draining or draining beyond the specifications of the battery. This ultimately extends their lifespan and reduces the risk of fire due to an overload in amperes.
How Does it Work?
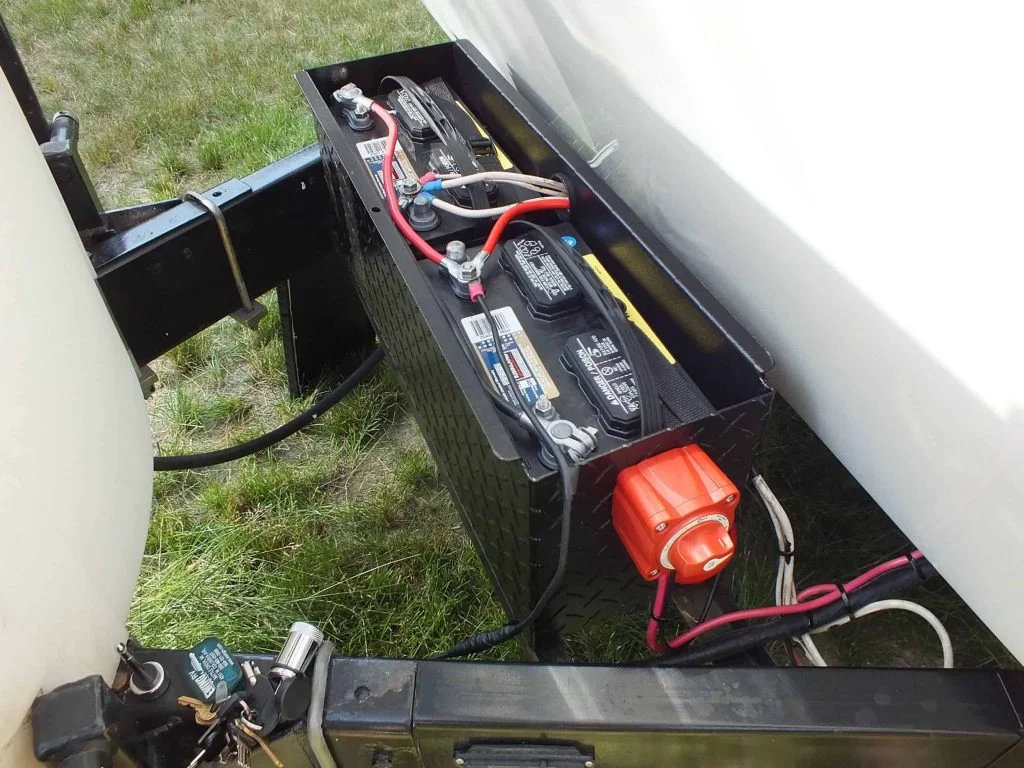
An RV battery disconnect switch works by breaking the connection between your RV’s house battery and the 12-volt power source.
Here is the tricky part, though – the switch is backwards from what you may imagine.
When the switch is turned “off”, it will connect the battery discharge to any accessory that uses 12-volt power in your RV, such as an air conditioner, water pump, and refrigerator.
If the switch is turned “on”, then it will disconnect the battery. This ensures that no power is drawn from the battery while it is disconnected.
What Voltage Does An RV Disconnect Switch Use?
In other words, an RV disconnect switch works by breaking the connection between your RV’s house battery and the power source. The RV disconnect switch typically uses 12-volt power to operate, and your RV’s house battery should be capable of supplying this voltage safely without any issues or damage caused by overcharging or discharging.
You will typically leave your disconnect switch off, as that will allow you to use the power on a regular basis. However, if you do need the power cut, you can turn the disconnect switch on whenever you need.
How To Install An RV Battery Disconnect Switch Safely & Properly
Before installing your RV battery disconnect switch, you should read through your RV’s or switch’s manual for instructions on how to properly install the device. You should also ensure that your RV’s house battery is fully charged and ready to use before you connect it to the disconnect switch.
Start by donning gloves and then disconnecting the battery cables from the battery terminals of your camper, using a wrench. You will want to start with the negative battery cable before moving to the positive cable. Then place the disconnect switch onto the negative terminal and screw it into place. While the switch is open (meaning the circuit cannot be completed), reattach the positive cable to the battery.
Next, reattach the negative cable (with the switch still open), attaching it to the part of the switch that is opened. Close the switch (which means turning it “off”) and then double check your RV for any power. At this time, you should have 12-volt power running through your camper.
Tips For Extending Battery Life
Once your RV disconnect switch is installed, you should target any additional power related issues that will impact the longevity of the batteries in your camper. This includes ensuring that your batteries are not overcharged with a smart charger, as well as keeping them at room temperature and out of direct sunlight.
You may also want to consider using solar power or propane to supplement dry camping, as this will help reduce the battery load on your trailer. Lastly, be sure to unplug all accessories when not in use to preserve battery life and avoid potential electrical fires. For example, be sure to turn the disconnect switch “on” in order to store away your RV for the winter or for however long.
By understanding how RV battery disconnect switches work, what voltage they use, and how to install them safely and properly, you can ensure that everything works as expected and that the batteries on your camper are well taken care of, no matter what.
Conclusion
There you have it! Everything you ever wanted to learn about RV disconnect switches.
All in all, RV battery disconnect switches are a great way to cut off all of the power to your RV in one fell swoop when it is not in use. Not only that, but they even extend the life of your batteries!
However, you should ensure that your switch is installed properly and that all accessories are unplugged while not in use. With these tips and knowledge, you will be able to keep your camper’s electrical systems running safely and efficiently for years to come.
Are you going to install an RV battery disconnect switch? Let us know about it in the comments below!