What’s better than using one battery in your vehicle is definitely two perfectly working ones. A dual battery system equals more power and, thus, is advantageous to anyone who wants to increase their vehicle’s electrical capacity.
This is especially where you need it for camping purposes like powering a fridge or other appliances. So, it just makes sense to install a second battery and dual system setup. So how do you go about this? That’s our main focus in this article.
Table of Contents
Installing a dual battery system
If you’ve been skeptical about running two batteries with your vehicle, this is to say that there’s no need to fret. Since most vehicles use a 12-volt system, using two batteries, that is, 24 volts, will automatically boost its electrical capacity and prevent overburdening the main battery.
For some time, auxiliary batteries have worked the walk. Still, they need to provide more power for accessories such as charging phones and laptops, powering TVs, DVDs, portable fridges, and pump machines, particularly during camping. So, this leaves the dual battery system as the ultimate answer.
However, while installing this dual battery system may be a significant concern, it’s not as complicated as you think. This section provides the methods and step-by-step guide to installing a dual battery system.
Tools/materials needed for installing a dual battery system
Before we go to the main objective of this article, we must first know what we’ll need for the battery installation. Here are the necessary tool and materials:
- A secondary battery
- Dual battery kit
- Heat shrink
- Cable ties and lugs
- Electrical tape
- Marker pen
- Drill and drill bits
- Crimping tool
- Battery isolator
- Diagonal pliers
These tools and materials can be purchased from any local hardware store near you.
Installation process
Installing a dual battery system in a vehicle involves the following steps:
Step1. Find the right dual battery gear for your vehicle
This is a preliminary step in the installation process; however, it is one of the most critical. First, you’ll need to research what type of dual battery system is most suitable for your vehicle depending on what you plan on using it for (e.g., off-road camping, etc.).
The most common and recommended dual battery system is from the Australian manufacturer, REDARC, having good battery system reviews. You should use any of these, especially if it’s your first time installing a dual-battery system.
Step2. Purchase the secondary battery
Getting your second battery ready is also a crucial step in this process. It also depends on your planned use of the battery to decide what battery option is best, as different battery types have unique features. For instance,
- Lithium batteries are rechargeable batteries used in electric and hybrid vehicles with a high electrical capacity and portable size. It can charge and discharge up to 80-90% ad would maintain a high voltage when discharging, unlike lead-acid batteries. However, due to its heat restrictions, it can be positioned under the bonnet of your vehicle.
- Deep-cycle batteries cannot supply strong current as they are meant to provide low sustained current for an extended period. Nevertheless, it can be discharged up to 80% but is best discharged at least 45% to protect its battery life. Therefore, deep-cycle batteries are best used for recreational vehicles and marine applications.
- AGM batteries (absorbent glass mats) are vibration-resistant and do not release gases when charging because they are fully sealed. It is a lead-acid battery that guarantees superb performance, best for today’s vehicle with high electrical needs. They are most suitable for heated seats, large audio systems, start-stop vehicles, and other electrical devices. They are required to be partially recharged and discharged.
Therefore, before buying your secondary battery, you must ascertain the planned use of your battery system.
Step3. Get all other tools and materials ready.
Purchase all the components of your dual battery system and all necessary materials and tools for the installation, including a battery isolator, dual battery kit, and other hardware and tools required. You might already have some of these tools in your tool kit, but if this is your first time installing them and you do not, you can get them from any hardware store.
Step4. Mount the secondary battery
You’ll need to consider where to place your battery in your engine bay which also depends on the kind of battery you’re using. For instance, wet-cell batteries should be placed in a well-ventilated place and away from any ignition source because they release hydrogen gas. So, you can place them under the bonnet of the vehicle.
AGM batteries can, however, be placed in the vehicle because they are sealed but should be kept from extreme temperatures. Whatever your choice is, the battery should be easily accessible; also, you’ll require to be battery trays and other necessary accessories to install them.
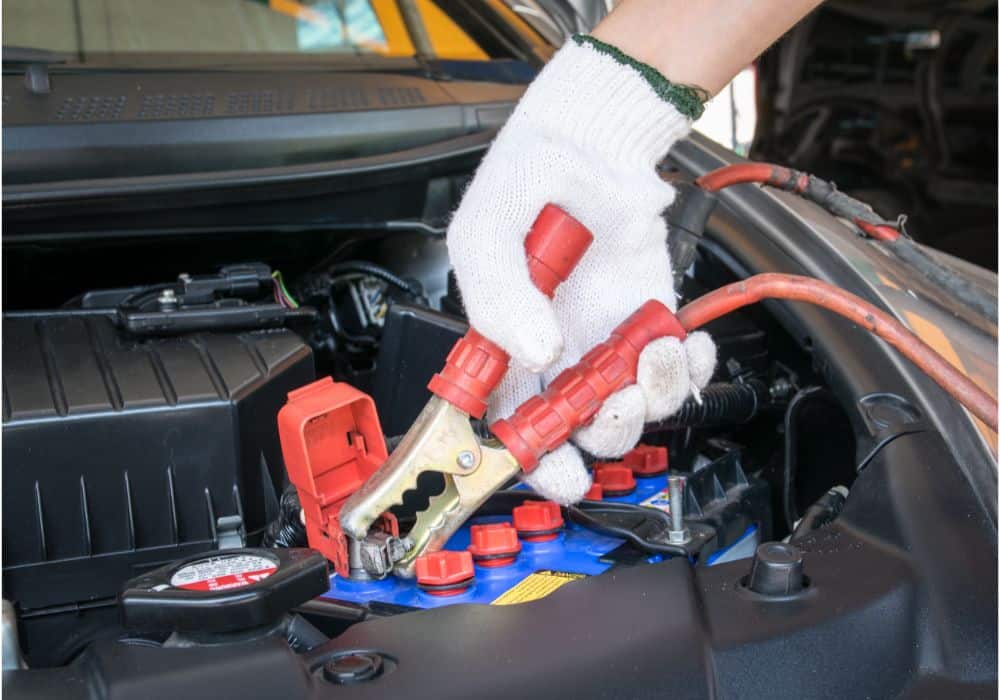
Step5. Disconnect the primary battery for the vehicle
Before starting any electrical work and installation, you must disconnect your vehicle’s main or starter battery. You can do this by removing the negative terminal from the battery.
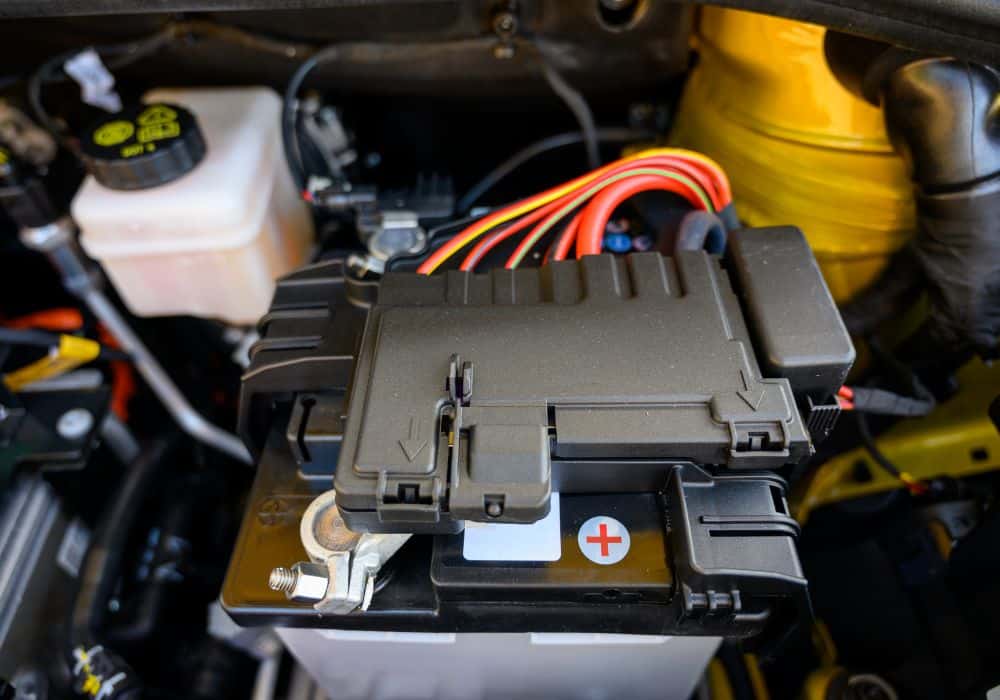
Step6. Mount the dual battery isolator
There are two kinds of dual battery isolators: the manual insulator requires you to turn it off and on when necessary. The other is the smart insulator, also known as VSR, which is an activated solenoid and is the best to use in this case.
The dual battery isolator, VSR, or voltage-sensitive relay allows the two auxiliary and starting battery simultaneously to operate simultaneously. Your battery charging system is an integral part of the dual battery setup since your batteries will need to charge to function.
Thus, while the vehicle is running, the VSR allows the alternator to charge the starting battery and, when complete, charges the auxiliary battery without discharging the main battery. This charging system is a better alternative to DC to DC chargers. While mounting, ensure the VSR is placed away from hot components like turbochargers and exhausts.
Step7.Connect the cables
After mounting the battery isolator, the next thing is connecting the mounting plate to your batteries. Here’s how to go about it:
- Use the lower mounting plate of the VSR as a template to mark where four holes will be drilled. Then, use a marking pen and drill bits to make the drill holes.
- Using the short screws, fasten the upper right and left bottom holes.
- Then take the cable plugged at either end and measure enough to reach the battery’s positive terminal from the mounting plate.
- In the same vein, measure and cut another cable to reach the positive terminal of the auxiliary battery.
Step8. Fix the lugs in place
The lugs are essential to ensure a firm grip in your installation. So, strip ff 15mm from both ends of the cable and fix in the lugs, using a crimping tool to strengthen their heat the lug for a few seconds of grip. Then, use a heat shrink to affirm a few seconds.
Step9. Earth the VSR and second battery
The black cable attached to the VSR is to be earthed securely, preferably to a bolt on the vehicle’s body. Likewise, the second battery requires a strong earth as well.
Step10. Connect the starting and secondary battery to the VSR
Connect the cable from the main battery to the VSR stud tagged “positive sense battery”, and the cable from the second battery should be connected to the spot with “positive second battery”.
Step11. Place the VSR on the mounting plate.
After successfully and neatly connecting the cables, place the VSR in the mounting plate and screw into the other two holes with a screw.
Step12. Connect the negative terminals
Attach the negative terminals to the starting and auxiliary batteries. Ensure that your wiring is neat and secure. After this, you’d have completed the installation process for tier VSR and the second battery.
Note: The installation instructions for the VSR may differ depending on the manufacturer. So, it’s best to check the fitting instructions that come with the product.
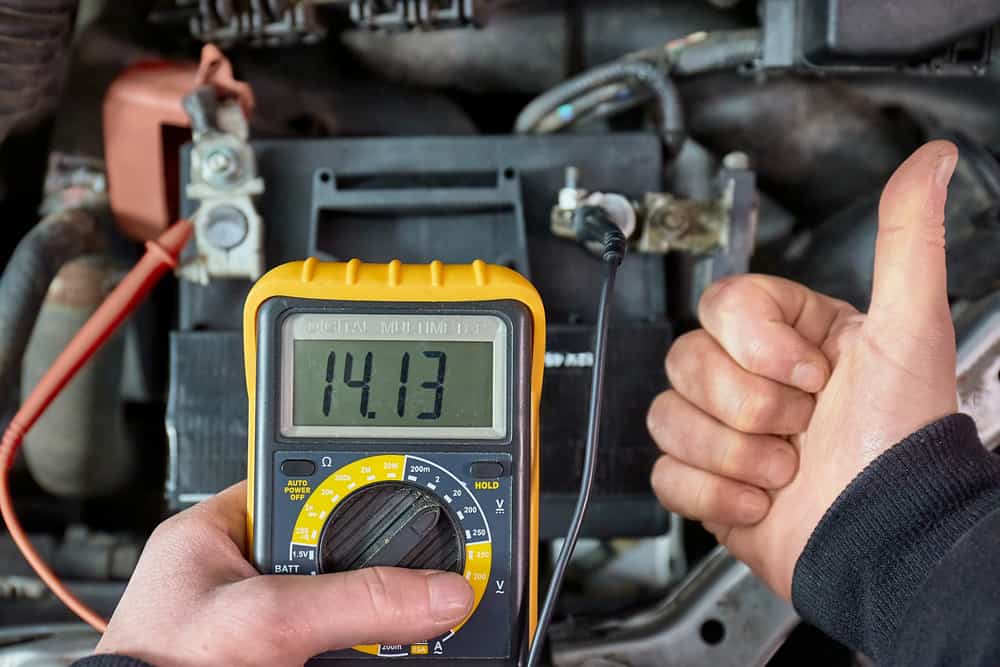
Step13. Test the newly installed dual battery system
To ensure your battery system is working correctly, you can test it using a multimeter. First, read the main battery after starting the car and notice when the voltage reaches up to 14 bolts. Next, you should see an indication that the second battery has started charging, usually by the relay clicking and shining red light.
Also, the relay will stop clicking when you turn off the engine, and the voltage falls below 12 volts. Your dual battery system has been successfully installed, and you can utilize it as you deem fit.
Conclusion
Installing a dual battery system in your vehicle is relatively easy if you know what to do. However, what’s next after installing it is maintenance to keep your system running smoothly and prevent your battery life from being shortened. So, always check the components of your charging system, wires, and battery tray before you head out. Also, please do not use batteries higher than their capacity to preserve battery life.