
From muffled engine clicks and delayed cranks to dimmed headlights and remarkably poor audio, problems caused by battery terminals are invariably hard to miss and, in practice, a chore to endure.
To fix loose battery terminals, you will need to thoroughly clean them and then secure the battery connection with a screwdriver–ensuring that it is sufficiently tightened. For corroded battery terminals, the solution is a little different. The battery terminal is usually cleaned with baking soda solution when the corrosion is mild. In severe corrosion cases, the battery terminals are outrightly switched out.
This article details two of the most common battery terminal problems. It discusses ways to identify them and the safest way to resolve them.
Table of Contents
How to Fix Loose Battery Terminal?
Typically caused by car bumps and accidental collisions, loose terminals in batteries are a common problem encountered by car owners. Loose battery clamps might cut your power output, causing your headlights to flicker and your ground wire to grow hot.
Although loose battery terminals might have indicators similar to several other terminal problems, loose battery terminals present an even greater danger. For example, a loose battery terminal might short-circuit internally, producing a discharge that can, in turn, short the positive terminal, causing an explosion.
Here we highlight the tools required to fix these issues and the steps necessary to resolve the problem.
Required Tools
- Wire brush
- Gloves
- Clean rag
- Screwdrivers
Step 1: Locate the Battery Terminal
To fix a loose battery terminal, begin by opening your vehicle’s hood and locating the battery terminal in the back.
Step 2: Examine the Battery Terminals
Sequel to locating the battery terminal, you’d need to examine the battery to determine the terminal-appropriate clamp required to provide the best fit.
Vehicles come with either a top-post terminal or a side-post terminal. With the top-post terminal, your metal posts are located either on the right side of the far top left, while the side-post appears on the side.
Step 3: Clean the Terminal Clamps
Since car batteries tend to gather dust after jaunts and especially long road trips, you need to clean the working surface when remedying a loose battery terminal issue. First, wipe down the top of your battery with a rag.
Step 4: Choose the Correct Socket Size
Select the Socket sizes appropriate for the earlier-determined post terminal. Next, connect the rachet to the socket, noting the connection order.
Step 5: Unclog the Battery Terminal
It is common for the dust to occlude battery terminals and prevent proper battery terminal connection. You’d need to scrub the terminal clean with a wire brush.
Step 6:
After scrubbing, attach the clamps to the terminal from step 4 and screw them in place.
How to Remove Corrosion on Battery Terminals?
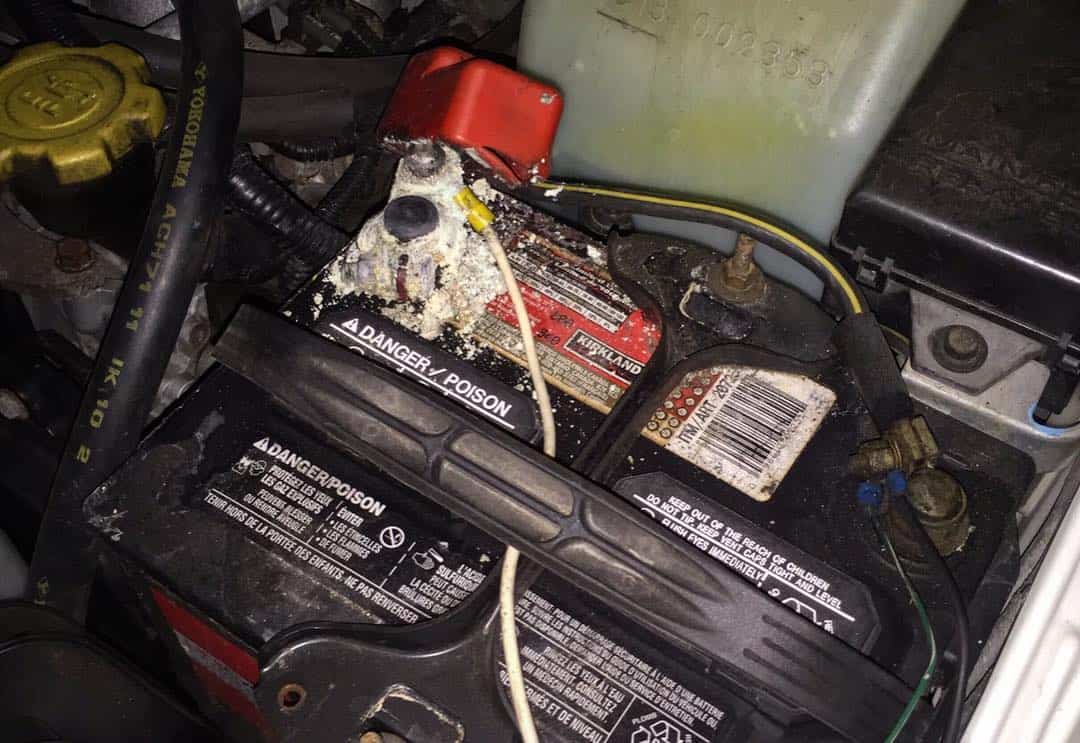
While severe corrosion might require a complete overhaul of battery leads, it is usually recommended that you clean your terminal with a baking soda solution in battery terminals where the corrosion is noticeably mild. This section details a beginner-friendly procedure to get your battery terminals as good as new.
N.B: Corrosion irritates the skin and poses a health hazard; before attempting to remove corrosion on terminals, ensure you recognize its dangers and take adequate precautions.
Tools and Supplies
Before we launch into the thick of things, you’d want to trip to the hardware store to fetch these tools and supplies.
- Baking soda
- A pair of nitrile gloves
- Eye protection
Step 1: Make a Baking Soda Cleaning Solution
Mix the baking soda and water into a solution in a utility bowl. You’d want to make sure its consistency is runny and not paste-like.
Step 2: Apply the Cleaning Solution to the Corroded Terminal
Next, dip a wire brush into your cleaning solution and apply it in a scrubbing motion on the rusted terminals of the lead-emptied battery. Typically, you’d want to brush the solution around the terminal and leads that turn and connect to the battery.
Step 3: Wipe the Terminal Dry with Tissue Paper or a Clean Rag
Go in with a clean rag, and wipe the terminal thoroughly with the cleaning solution. If the residue of the solution remains still, it is probably a good idea to go in with water for whatever spots you might have missed with the rag. Also, you should ensure you catch other corroded areas around the battery, as it could potentially damage your battery and engine.
Step 4: Apply Acid Neutralizers to the Terminal Post
With your battery terminals cleaned out and dried with paper towels, wipe the terminal post with an acid-neutralizing felt pad.
Step 5: Coat the Battery Terminal in Anti-Corrosive Spray
Finally, finish it off by spraying the terminal with a generous amount of anti-corrosive spray.
Pro-Tip: You could skip out on the baking soda cleaning solution and invest in a bottle of terminal spray cleaner.
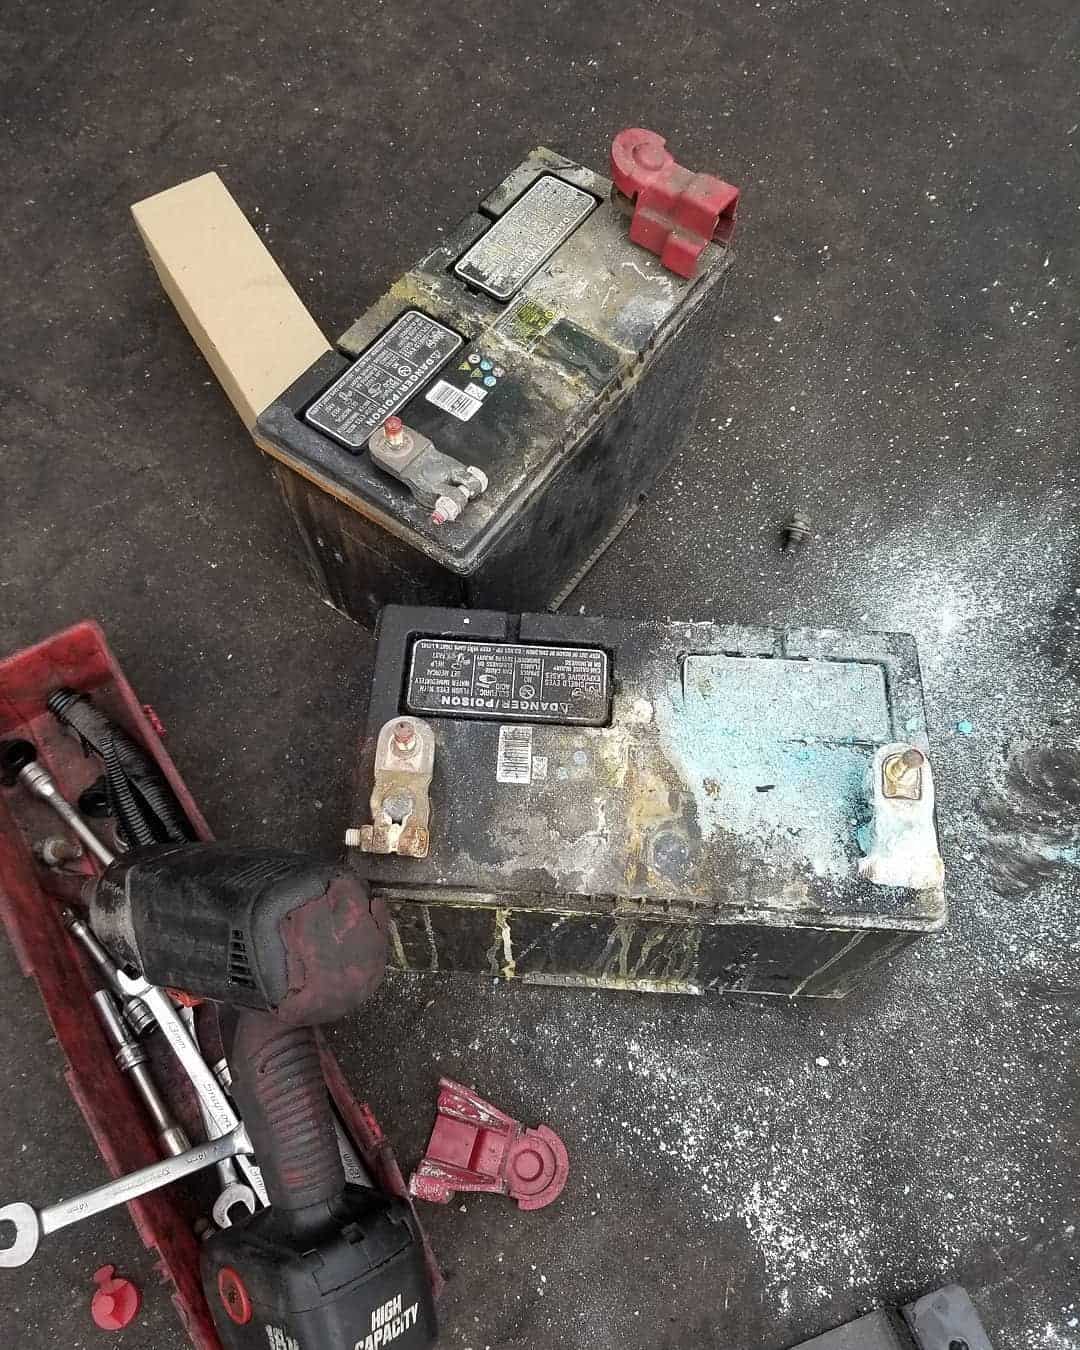
How to Replace Corroded Battery Terminals?

When battery terminals are corroded past repair, it is usually recommended that they are replaced altogether. However, before installing new battery terminals, you’d want to ensure the ignition is off and the car completely shut off.
Tools
- Wire brush
- Hack saw
- Wrench set
- Pliers
- Ratchet/socket set
Step 1: Locate the Corroded Battery Terminal
Peering into the hood of your car, locate the terminals on the top of the battery. With its positive and negative signs indicating their respective terminal, you’d be looking out for any terminal with a corrosion buildup.
Step 2: Pull out the Cable
Starting with the negative terminal, pull the battery cable out of the terminal to avoid shocks. You’d typically begin with your negative terminal to prevent your circuit from shorting and catching fire. Next, you go on with your positive terminal.
Step 3: Determine the Terminal Style
Although most battery terminals come in a clamp design, there are quite a few variants. Inspect the terminal to determine which you have.
Step 4: Remove the Node from the Terminal
Using an appropriately-sized wrench, rotate the nut until the terminal’s grip on the node is noticeably loose. Next, you’d need to keep the node away from the terminal. Use an old washcloth or rag. Do this for both terminals.
Step 5: Clean out any Residue Corrosion Buildup
After removing the wire top and the bolt, use a rag to clean out any corrosion on the terminal post.
Step 6: Cut and Strip the Battery Cable
Using a hacksaw or a wire cutter, cut affected battery cables off and pull back insulation by ½ an inch using a stripping tool.
Step 7: Inspect the Battery Cable for Corrosion
Battery terminal corrosion can run through the entire length of the power cable. Hence, you’d want to look through the length for indications of corrosion.
Step 8: Clean the Battery Cable Thoroughly
With your insulation pulled back, you might discover corrosion inside the cable. First, clean the corrosion using a baking soda-water mixture and a brush. Then, wipe the corrosion with a rag and ensure it doesn’t run along any exposed metal or wire. If, however, the corrosion runs along the cable. You are going to need to cut the cable.
Step 9: Replacement
Replace the old terminal with the new one and reinstall the wire plate right into place.
Step 10: Install a Heat-Shrink Tube
A heat shrink provides a way to secure the connection between the battery and the terminal. You’d want to ensure no bit of the wiring peeks out of the casing, as this increases the odds of arcing. Turn the screw in the head clockwise to ensure the flat washer and screw on the head secure the car battery terminal into place.
Step 11: Replace the Node
Place the terminal on either side back into their respective nodes using a cloth rag.
Step 12: Run the Battery Test
Now that you have switched out the corroded terminals turn on the ignition and see if your engine fails to start. Next, look back behind the hood and recheck your battery terminal connection.
What Causes Corrosion in Battery Terminals?
Although lead-iron bi-metallic contact is often advertised as the leading cause of corrosion in battery terminals, in practice, battery terminals corrode from exposure to acidic fumes billowing from the battery.
Corrosion can be attributed to a wider range of causative factors than bi-metallic contact and billowing acid fumes; below, we outline the most common causes of battery terminals’ corrosion.
1. Faulty Alternator
A bad alternator doesn’t just cause battery power to deplete faster; it might also lead to overcharging, causing the battery acids to leak through vents and onto the battery terminal.
2. Leaking Battery Fluid
It is not uncommon for batteries to develop holes and cracks due to damage. These cracks can, in turn, leak electrolytes onto the terminal, causing it to corrode.
3. Battery Contact
When the leads that connect to terminals turn loose or, worse, corrode, the resistance in the circuit is noted to be too high for charging and discharging.
4. High temperature
At temperatures beneath or above the working temperature of 70 degrees Fahrenheit, battery performance is seen to plummet. Furthermore, when the ambient temperature is comparatively high, the chances of a battery’s corrosion are even higher as the electrolytes are seen to expand and the pressure increases.
Final Thoughts
Faulty battery terminals reduce your overall power output and, with Electric vehicles, basic car functionality; however, they are typically avoided by regular trips to the shop.
Note: Navigating corroded terminals can be overwhelming for first-timers. Hence, taking your car to the shop is okay if you feel intimidated.