Trying to unwind bolts and nuts with the wrong size wrench is a pain in most cases but it is especially problematic when working with a car battery. Car batteries are not only one of the most crucial parts of any vehicle, but they also contain lots of power and need to be handled with care.
So, what is the right size socket for a car battery terminal, what other tools do you need when changing a battery, and how exactly should you go about the whole endeavor? Let’s find out below.
Table of Contents
What size socket for battery terminal do you need?
Unfortunately, there isn’t just one answer that applies to all car batteries as every vehicle is different and every car battery model has its own specifics and quirks.
Most of the time, however, a car battery’s bolt will be 10 millimeters in diameter or 0.4 inches. Such a bolt will also usually be 1.24 inches or 31.5 millimeters long and the bolt’s thread would be 5/16ths of an inch (or 8 millimeters).
There are many other sizes, however, such as 8 millimeters (or 0.3 inches), 11 millimeters, (0.43 inches), 12 millimeters (0.47 inches), 13 millimeters (0.5 inches), and others.
So, the wise thing to do is to either:
- Measure the width of your car battery’s bolts beforehand
- Research online what are the bolts and nuts of the car battery of your specific car model
- Be prepared with a full set of socket wrenches before you even lift your car’s hood so that you know you have everything you need
Trying with a socket wrench that’s a bit too big for your battery’s size nut, that isn’t that much of a problem – it just won’t work. However, if you use a wrench that’s way too small you risk stripping the threads on the battery terminal.
What other tools to prepare?
Depending on the type of battery you have and what exactly you want to do with it, there are various tools you might want to prepare. Some of the things we’d suggest include:
- A paintbrush and a narrow metal wire brush
- A ratchet
- Wrenches of various sizes, including a crest wrench and an adjustable wrench
- Pliers
- A hammer
- Baking soda and water solution
- A battery terminal cleaner
- A can of corrosion protection
- Safety goggles and protective gloves
- Several rags
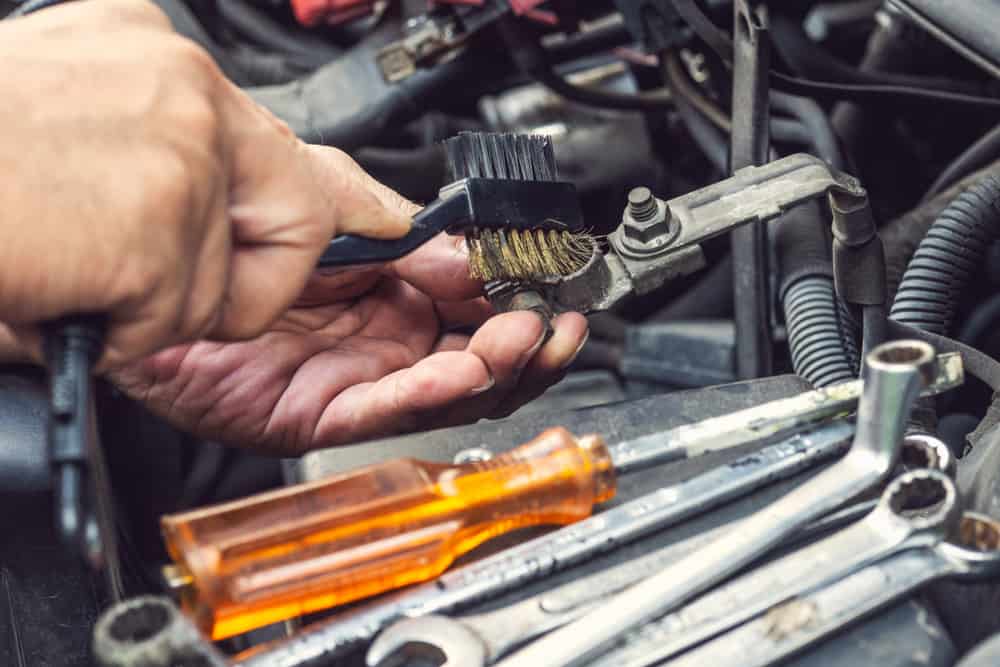
The baking soda and water solution are usually used to clean the battery cables and terminals. Just insert a brush with the solution and twist it around to clean your battery’s positive and negative clamps. The battery terminal cleaner can also work well for this. This would be the time to use some corrosion protection too if you have it.
The wrenches and pliers are necessary for the bolts and nuts holding the terminals at the top of the battery. Do keep in mind that battery hold-downs can come in many different types, sizes, and shapes – clamps, bolts, rubber bands and cords, cable ties, and more.
That’s why you’ll need to be prepared with various tools such as a crescent wrench, an adjustable wrench, pliers, and more. A hammer can also come in handy – not to hammer down on the terminals themselves, of course, but to help you gently tap the wrench as you’re trying to turn the nuts and bolts.
How to change your car’s battery?
Now that you have everything prepared and you what each tool is for, let’s go over the step-by-step of removing, inspecting, and changing your car battery. This can be done either to change your old battery with an old one or to just inspect, clean, test with a voltmeter, and re-install your old battery.
Either way, you need to be very careful at every step of the way if you don’t want to accidentally damage your battery, car, or yourself. Here’s what you’d want to do:
1. Safely prep your car and working area
Just like driving a car, there is a very specific sequence in which you need to do things when opening your vehicle’s hood. So, first, turn off your car’s engine, and set your vehicle on Park. Set the barking brake too and take the key out to make sure your car’s electrical system is off.
List through your car’s manual to make sure there aren’t any vehicle-specific steps you’re not skipping – there are thousands of types of automobiles out there, and we can’t cover all of them in a single article. Then, spread a towel or a large rag across the fender to protect the paint from the corrosive acid.
2. Start by removing the cables from your battery’s terminals
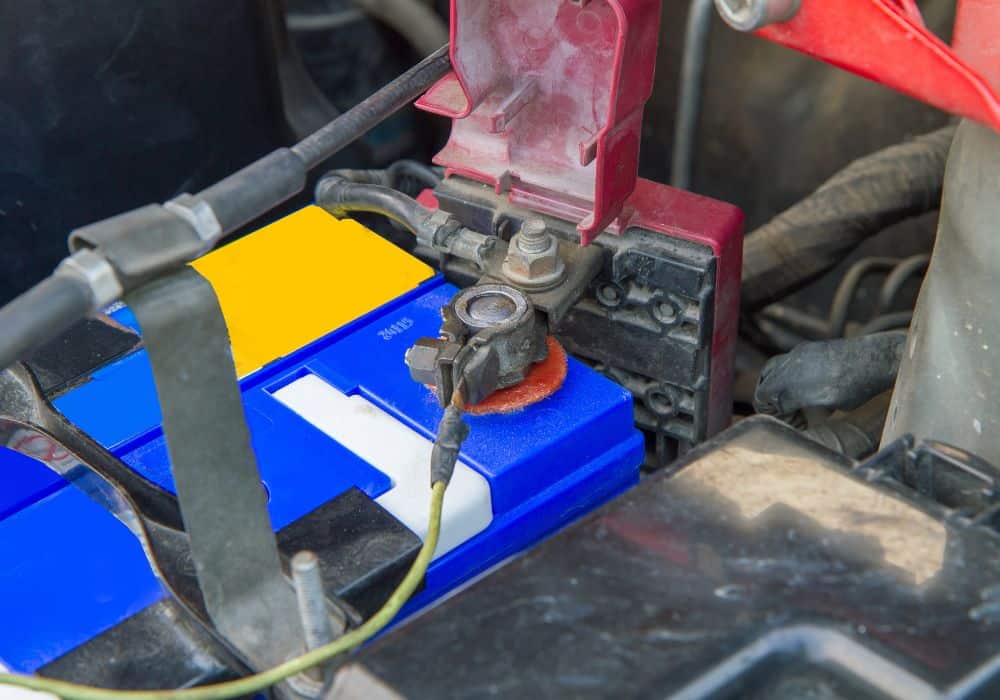
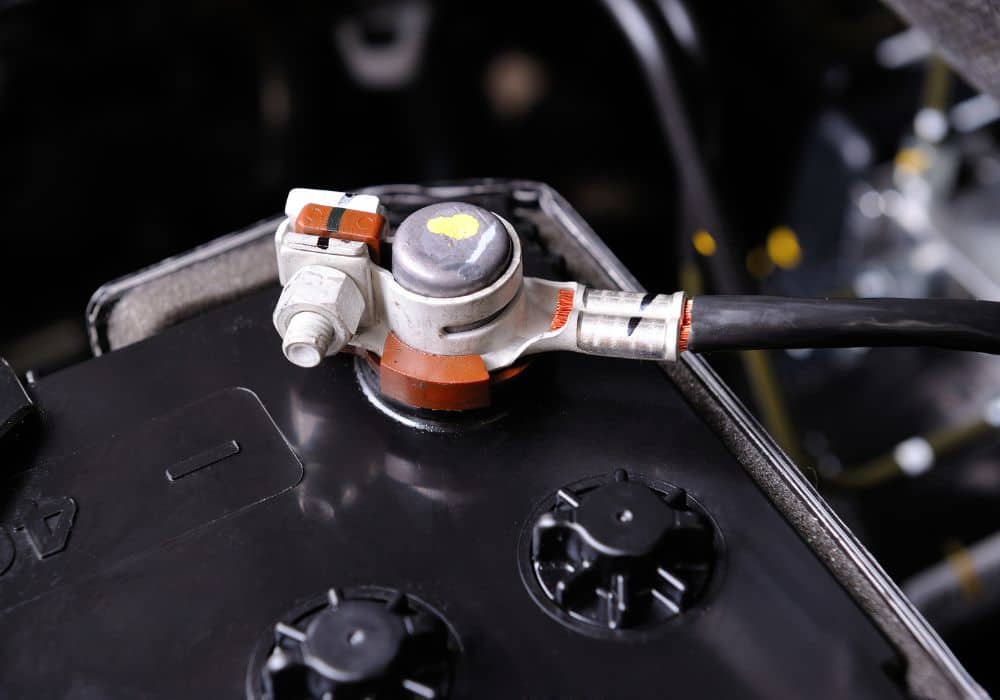
Every battery has both a positive terminal and a negative terminal. The negative terminal (or ground) will be marked with a minus sign or a “NEG” label, and it will likely be black whereas the positive terminal or ground will usually be red and will have a plus sign or a “POS” label.
If your car is “negative ground” you’ll have to remove the positive terminal cable first. Likewise, if your car is “positive ground”, remove the negative terminal cable first. To figure out if your car is positive or negative ground, you can either look in your car’s manual or you can inspect the battery – the cable that goes to the frame of the car determines if it’s negative or positive ground.
Each terminal’s cables will be held in place with a nut and bolt of a specific size – usually 10 millimeters in diameter or 0.4 inches but not always. Using protective gloves and a socket wrench of the appropriate size, gently unwind the nuts and bolts on the terminals’ cables.
3. Remove the screws or other fasteners holding your battery in place
As we said above, every battery has different hold-downs though most are cable ties, rubber bands or cords, clamps, and bolts. So, the next step is to unfasten all the hold-downs one by one and then gently take out the battery itself.
Continue wearing gloves while doing so and remember where every individual screw was. It’s a good idea to put all the screws, bolts, and hold-downs on a separate towel or rag on the side, arranged in the same way they were when they were attached to the car.
4. Check out the battery’s tray too
It’s easy to gloss over that step but don’t forget to inspect your car battery’s tray. It will likely be a bit rusty if you haven’t been looking at it for a while and there may be signs of corrosive deposits. To fix that, dissolve some of the baking soda solutions and clean the tray with it.
Keep your gloves on while doing so and give your battery’s terminal a good scrub with the solution while you are at it. It’s also wise to inspect all the nuts and bolts as they may have gathered some rust and corrosion over the years – clean that too if so.
Some nuts and bolts may need replacing because they are too old and corroded – in that case, it’s worth it to take new ones of the same type when you’re re-installing your battery. That may be a hassle if you have to go to the hardware store just for a few bolts but it’s usually worth it for the extra safety.
5. Put the battery back in

If you’re changing an old battery with a new one, you may have to fasten it in a different way – that depends on if it’s a different type of battery or not. Most of the time, it will be a newer version of the same car battery and it will have the same set of hold-downs as your old one.
If you are going to be re-installing your old battery after a cleaning and a maintenance check-up, then the process will be the same as when you were removing it but in reverse. Whatever the case, remember to do everything in order and double-check every connection.
6. Reconnect the battery’s terminals
The key here is to do it in the reverse order to which you removed the cables – if you first removed the negative cable, then first reconnect the positive one and vice versa. Make sure the cables are connected tightly to the terminals and double-check them both.
7. Dispose of old batteries responsibly
If you were changing your battery, remember to dispose of the old battery legally and responsibly. Car batteries are corrosive and toxic and there are special recycling centers where they are meant to go.
In conclusion
Every car owner needs to check on the electrical system of their vehicle every once in a while. The first few times are always stressful as you may feel like you don’t know what you’re doing.
And there are, indeed, risks to be aware of. Using the wrong size socket wrench for the battery terminals can seem like a silly mistake but there are quite a lot of people who make it. And, as with everything else relating to a car battery, it’s wise to always be prepared to avoid any and all possible issues.