Connecting sealed lead acid batteries in series is a great way to get more power out of your battery bank. By combining two or more batteries in sequences, you are essentially doubling (or tripling, etc.) the voltage of your battery bank. This can help power high-draw devices like motors or inverters. In this article, we’ll show you how to connect a battery in series safely and efficiently. Let’s get started!
Table of Contents
Why connect your battery to a series
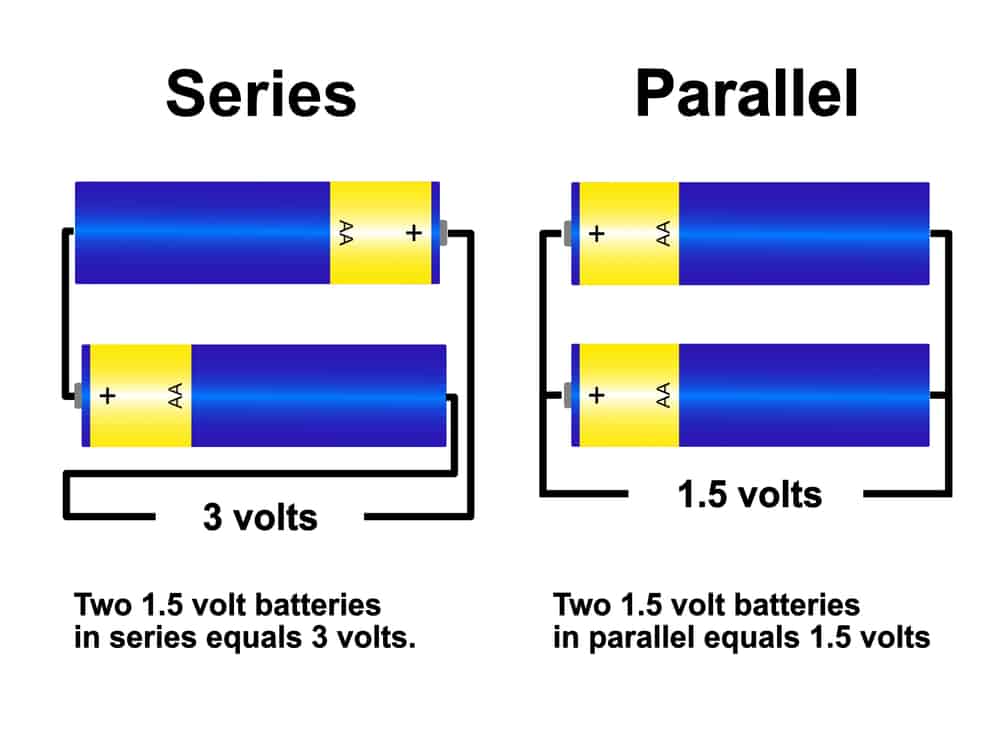
When batteries are connected in a series, the system’s voltage is increased while the battery capacity and amp hours remain the same.
The current will be drawn from all the connected batteries, so it is important that they can all provide the same current level. If one battery cannot provide the same amount of current as the others, it will cause the system to fail.
Batteries can also be connected in parallel, which results in an increased amp-hour capacity while keeping the voltage the same. Each battery provides its current in a parallel connection, so they don’t need to match.
However, they must have the same voltage to be charged and discharged at the same rate. Connecting batteries in series or parallel allows it to create a custom power system that meets the application’s specific needs.
Tools
- Voltmeter or Multimeter
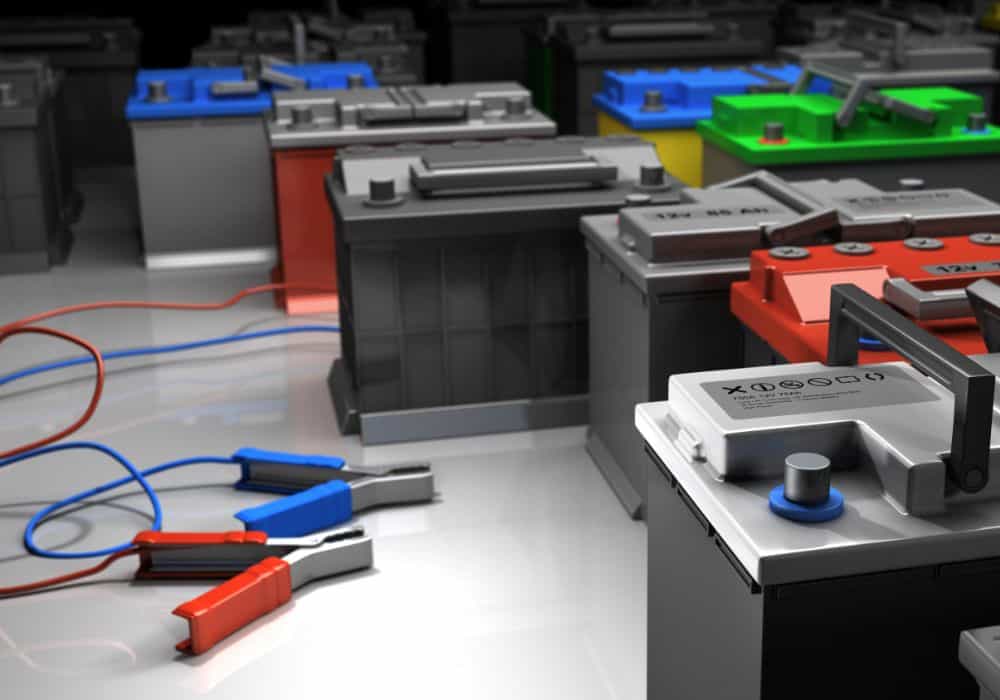
- Jumper Cables or Jumper Wire
How to Wire a Battery in Series Configuration
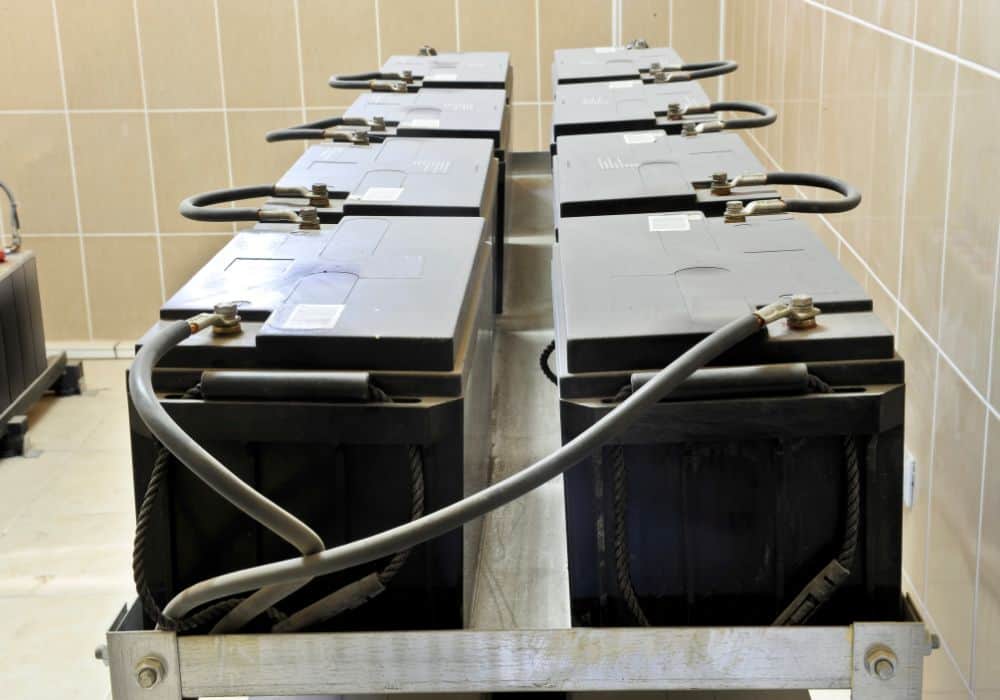
When connecting batteries in series, the number of batteries you need will depend on the voltage of the system you’re using. When connecting batteries in a series, it is essential to use batteries with the same volts and amps. This will prevent short-circuiting some of the batteries.
The best way to avoid this problem is to buy batteries from the same manufacturer and of the same type. That way, you can be sure they have the same voltage and amps.
If you’re not sure what kind of battery you need, ask a salesperson or consult the owner’s manual for your device.
Step1: Attach Cables
First, you will want to connect a jumper cable to one of the batteries on the negative terminal. First, attach the cable to the negative terminal to locate the symbol on the battery.
The logo will be either a minus sign (-) or a black dot. Once you have found the character, insert the clamp of the jumper wire or cable onto the terminal and tighten it in place.
Ensure the clamp is secure before proceeding, as a loose clamp could cause sparks or damage to the battery.
Step2: Connect Terminals
Now that the negative terminal of the first battery is connected, you can connect it to the second battery’s positive terminal.
You can recognize the positive terminal because it has a plus sign (+). Attach the free end of the cable to the positive terminal of the other battery.
Ensure all connections are secure and free of debris or corrosion before proceeding.
Step3: Continue this process
Repeat this process of connecting one battery negative terminal to the next battery positive terminal until every battery you want to connect is united by jumper wires or cables.
Although you can connect as many batteries as you want, I recommend no more than four batteries to stay on the safe side. Once all the batteries are connected, you can enjoy increased power output.
In addition, it is essential to connect the batteries in the correct order. If you misconnect them, the batteries could be damaged or even explode. Therefore, it is crucial to consult a professional before Attempting to build a series battery pack on your own.
Step4: Test your voltage
The final stage in connecting batteries in series is to test the voltage output using a voltmeter. This is an important step, as it will ensure that the batteries are connected correctly and are able to provide sufficient power to the system.
To test the voltage, simply connect the voltmeter to the positive and negative terminals of the battery pack. The reading should be close to the rated voltage of the batteries. If you have four 12-volt batteries, the reading of all four should read 48 V.
If it is significantly lower, then there may be a problem with the connection or with the batteries themselves. Once you have verified that the voltage is sufficient, you can then proceed to install your batteries to the application.
How to Connect batteries in a parallel configuration
Some people opt to wire batteries in a parallel configuration. Both processes are similar and achieve the same goal. However, wiring your batteries in parallel is slightly different from wiring them in series. Here are the steps to wire your batteries parallel
Step1: Connect the negative terminals
The first step to connecting your battery in parallel is attaching a jumper wire to the negative terminals of every battery. The negative terminal will have a negative (-) symbol. Each cable should be positive/ positive and negative/ negative.
Remember, just like wiring in series; your batteries must be the same voltage to avoid damage to the batteries.
Step2: Connect the positive terminals
Next, attach a jumper cable to the positive terminals of each battery. Ensure the clamps are firmly attached and that you use a heavy-duty jumper cable, as the increased amperage can cause regular wires to burn out.
Step3: Continue the process
You can continue connecting negative to negative and positive to positive until your last set of batteries. When you are finished, you will have created a powerful circuit that can be used for a variety of applications.
Once the batteries are connected, you can run multiple devices simultaneously without worrying about overloading the system.
Step4: Test your voltage
Now that you have your parallel connection set up, it’s time to test it. The best way to do this is with a voltmeter or multimeter. First, connect the voltmeter or multimeter to the positive and negative terminals of your batteries.
If everything is connected correctly, the overall voltage should equal what all of your batteries put together should measure. Two 12V batteries should read 24V. Congratulations – you’ve successfully set up a parallel circuit!
Can I wire in series and parallel?
Yes! You can wire in both series and parallel and this is called a series-parallel connection. The details are connected end-to-end in a series connection so that current flows through each component.
In a parallel connection, the elements are connected side-by-side so that the current can flow through more than one element simultaneously.
The advantage of a series-parallel link is that it provides a more flexible way to connect components than a pure series or pure parallel connection.
The disadvantage is that it can be more difficult to troubleshoot than a pure series or parallel connection.
Step1: Wire your batteries in series
To begin, follow the steps listed above to connect your batteries in series. However, you only want to connect two batteries together at a time instead of continuing with all of them.
So, if you have four batteries, connect two (negative terminal to positive terminal), and then connect the other two.
Step2: Wire your batteries parallel
Next, align your sets of batteries next to each other. You should see an open negative terminal on every other battery. For instance, if you have four batteries, connect the negative terminals of both batteries using a jumper cable.
Now, do the same thing with the two open positive terminals. Connect one end of a jumper cable to one free positive terminal and the other end to the other free positive terminal.
Step3: Test your voltage
Lastly, check the voltage on all four batteries to ensure they are wired properly. There you have it; you have successfully wired your batteries both in series and parallel.
Types Of Series Circuits
A series circuit is one in which the current passes through each new load in succession. This type of circuit is often used in batteries, as it allows the electrical charge to flow evenly through each load.
- The most common type of series circuit is the wet cell battery, which uses a liquid electrolyte to allow charge to flow between the electrodes.
- Another type of series circuit is the dry cell battery, which uses a solid electrolyte to allow charge to flow between the electrodes.
- The third type of series circuit is the gel cell battery, which uses a gel electrolyte to allow charge to flow between the electrodes.
Each of these types of batteries has its own advantages and disadvantages, which should be considered when choosing a type of battery for a particular application.
Conclusion
So, there you have it! Your very own guide on wiring a battery in series. We hope you found this article helpful. If you did, let us know in the comments below.
And if you have any questions or need help with anything related to batteries or electrical work, don’t hesitate to reach out to us. We’re always happy to help!